In more than 25 years of practice, I have seen nearly every way a child can hold a pencil. While some methods are acceptable, others can hinder the development of legible handwriting and affect writing endurance. Here are some things to look for when observing the way children hold pencils, as well as some tips to help you teach children to hold pencils and crayons correctly.
What Is an Ideal Pencil Grip?
The ideal pencil grip is called a tripod grasp. In this grip, the child uses the thumb and index finger to hold the pencil’s tip while stabilizing the shaft with the lateral side of the middle finger, forming a tripod-like structure.
Another acceptable grip is the quadropod grasp, where the middle finger also rests on the pencil, alongside the thumb and index finger. These grips allow children to hold pencils securely while having precise control over the tip. If a child settles into a functional quadropod grasp, support and encourage it; there is no need to force a switch to tripod.
Identifying Incorrect Pencil Grips
Not all children arrive at a tripod or quadropod grasp on their own. Some settle into grips that lack stability: the thumb wraps over the fingers instead of supporting the pencil, the hold is too loose, or the fingers land in positions that limit control. The chart below shows how grasp typically develops from the toddler years onward, along with the most common inefficient grips (thumb wrap, thumb tuck, interdigital brace, supinate, and index grips) and the grips considered efficient. A child writing with an inefficient grip must exert more effort to write legibly, and that effort draws energy away from the learning the writing is meant to support.
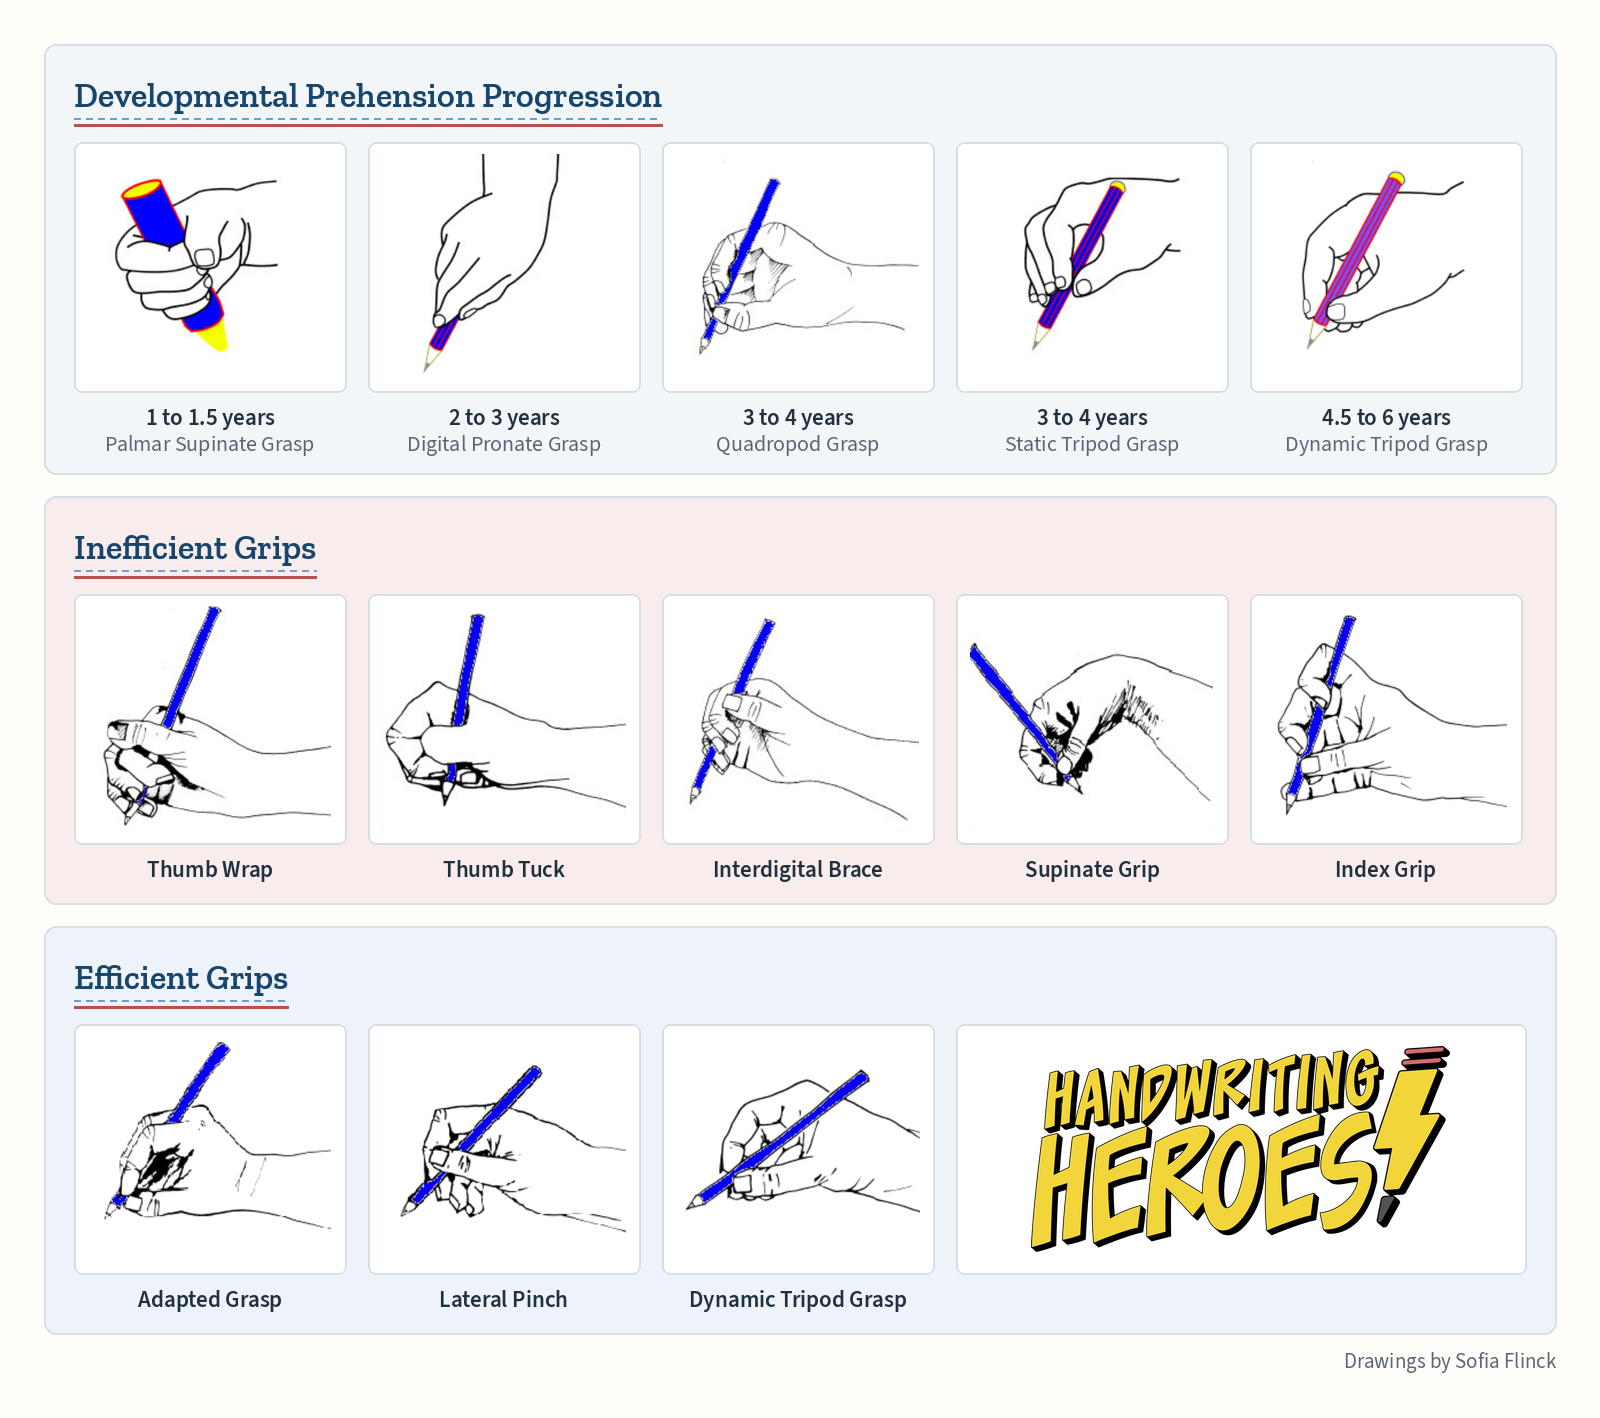
It is important to understand that children do not hold their pencils incorrectly because they are not trying hard enough. An inefficient grasp is almost always a compensation: the hand’s response to a weakness elsewhere in the system. That weakness may lie in the small intrinsic muscles of the hand, or in the shoulder and core stability that anchor the arm. It may involve joint hypermobility: finger joints that are overly flexible and collapse under pressure, making a stable grip difficult to maintain. Or it may stem from reduced sensory feedback, the touch and proprioception that tell the fingers where the pencil sits without visual monitoring. A child who fists the shaft or wraps her thumb is not being careless; she is stabilizing the pencil in the only way her body currently allows. If several of these areas appear to be involved, the foundational skills behind handwriting provides a fuller picture.
Does Pencil Grip Develop Naturally?
Not always. While some children may develop a tripod grasp by kindergarten, others may struggle with proper grip until second grade. To help children develop appropriate grips early on, consider these tips.
Encourage drawing and coloring from a young age. Correct their grip if needed, as children often require guidance in holding pencils and crayons correctly.
Provide short pencils and crayons. Although children may protest, the shorter shafts naturally position their fingers towards the tips, facilitating functional grips.
Teach the “flip grip” technique. Have children place the pencil on a flat surface with the tip facing them. Instruct them to position their thumb and index finger above the tip and then flip the pencil up into their hand, resting the shaft on the web space between the thumb and index finger. This places the pencil correctly for a tripod grasp, with the middle finger stabilizing it.
Encourage play with small objects that require pinching and rolling motions. Playdough, clay, Lite-Brite, and small building blocks like LEGOs can enhance finger strength and precision during play.
Work on vertical surfaces. Tape paper to the wall, or offer an easel or chalkboard. Writing on a vertical surface naturally positions the wrist in extension, the posture a mature grasp requires, and it builds the shoulder stability that anchors the whole arm.
Play “hide the treasure.” Have the child tuck a pom-pom or a coin under the ring and pinkie fingers and keep it hidden there while the thumb and pointer do a job, like picking up beads or coloring. This builds the split in the hand that a tripod grasp depends on: two fingers holding still while two fingers work. (It is the same principle behind the Wikki Stix trick below.)
Pinch against resistance. Tongs, tweezers, clothespins, spray bottles, and hole punches all make the thumb and fingers squeeze against something that pushes back, which strengthens the exact muscles a pencil grip relies on. Games like picking up cotton balls with tongs turn the exercise into play.
Match your expectations to development. As the chart above shows, a fisted grasp is completely normal at 18 months, and a tripod grasp often is not solid until age 4 or 5. With toddlers and young preschoolers, the goal is plenty of crayon time, not grip correction.
Improvising a Pencil Grip with Wikki Stix
Store-bought pencil grips work well for many children, but they are small and easily misplaced. When one of my students arrived having lost his pencil grip yet again, I improvised a temporary one in about a minute using Wikki Stix, the bendable, wax-covered yarn sticks found in most craft aisles. The materials matter less than the method: observe closely what the hand is doing incorrectly, then build a cue that corrects precisely that. Here is how it worked for him.
He held his marker in an inefficient, supinated thumb-wrap grasp: fingers fisted around the shaft with the thumb wrapped over the top. A grasp like this moves the marker with the whole hand and arm rather than the fingertips, which reduces both control and endurance.
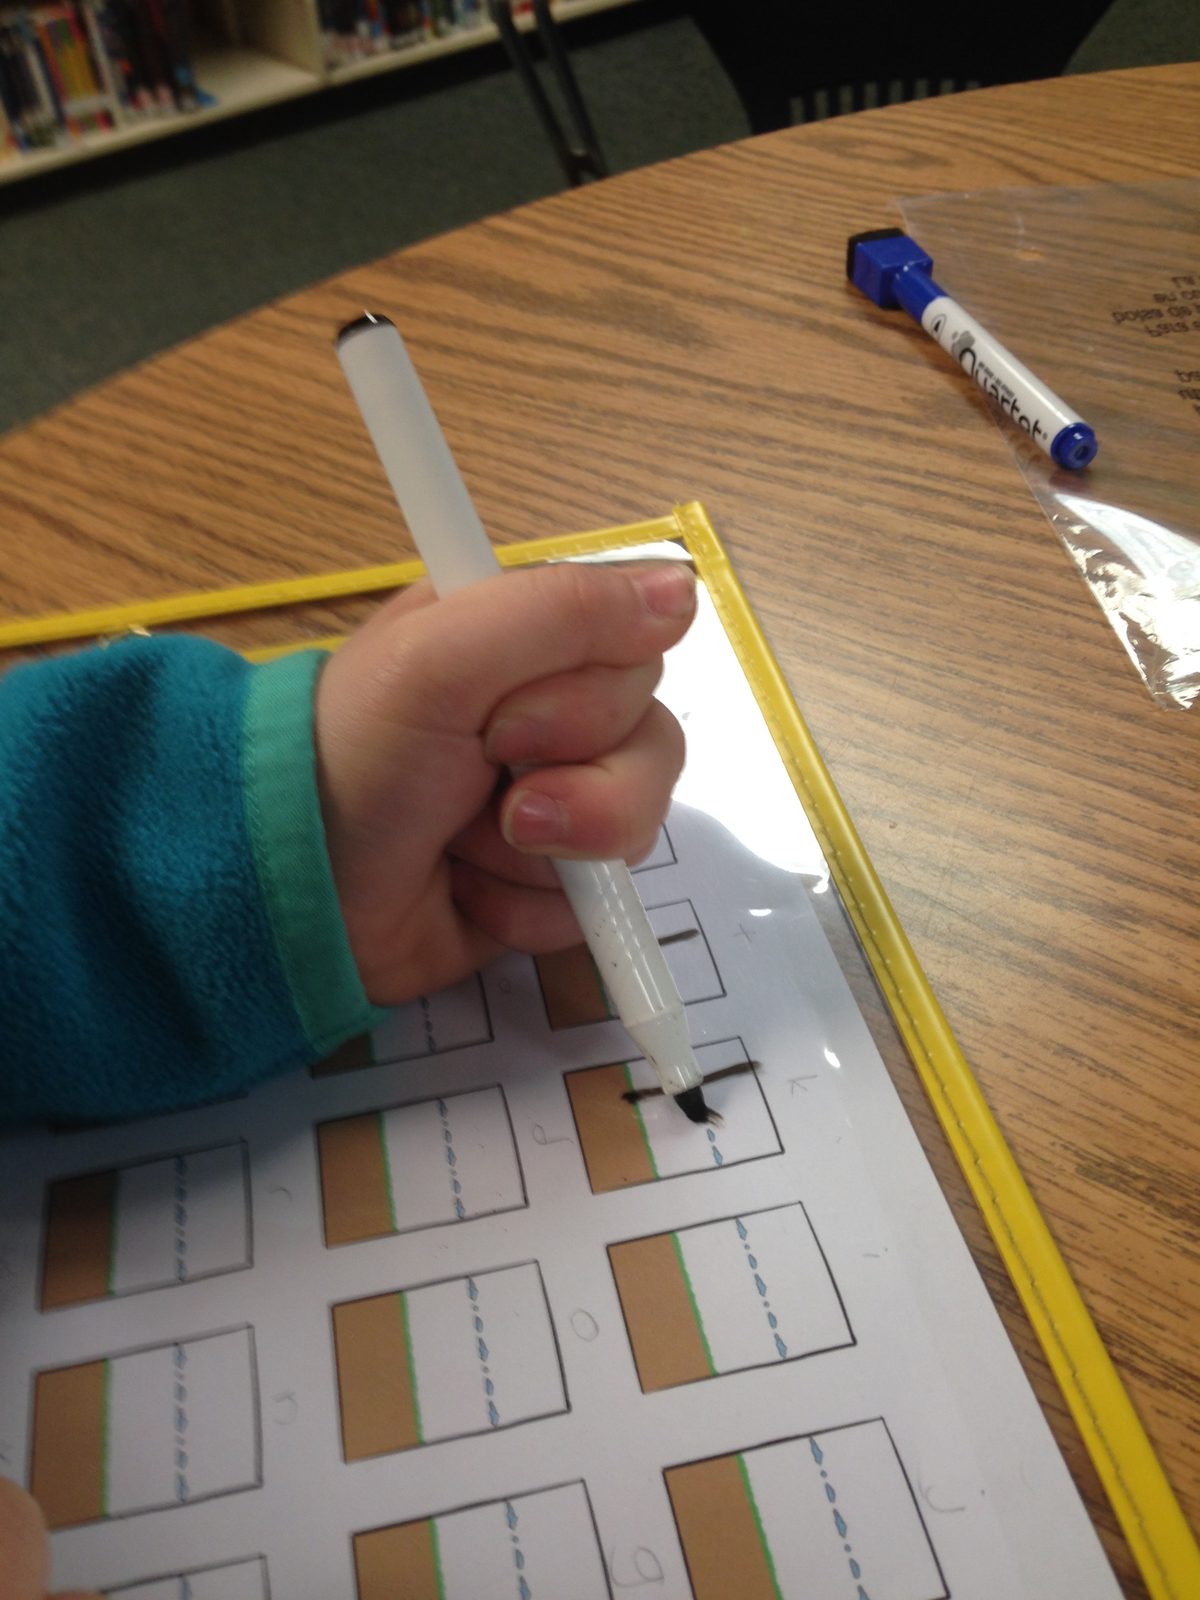
The first problem to address: he was not holding the marker with his pincer fingers (the thumb and index finger). I coiled one end of a Wikki Stix into a small ball for him to hold under his pinkie and ring fingers. Giving those two fingers a job keeps them occupied and out of the way, freeing the thumb and index finger for precision work. The other end, wrapped around the marker, serves as a placement cue marking exactly where the thumb and index finger should rest.
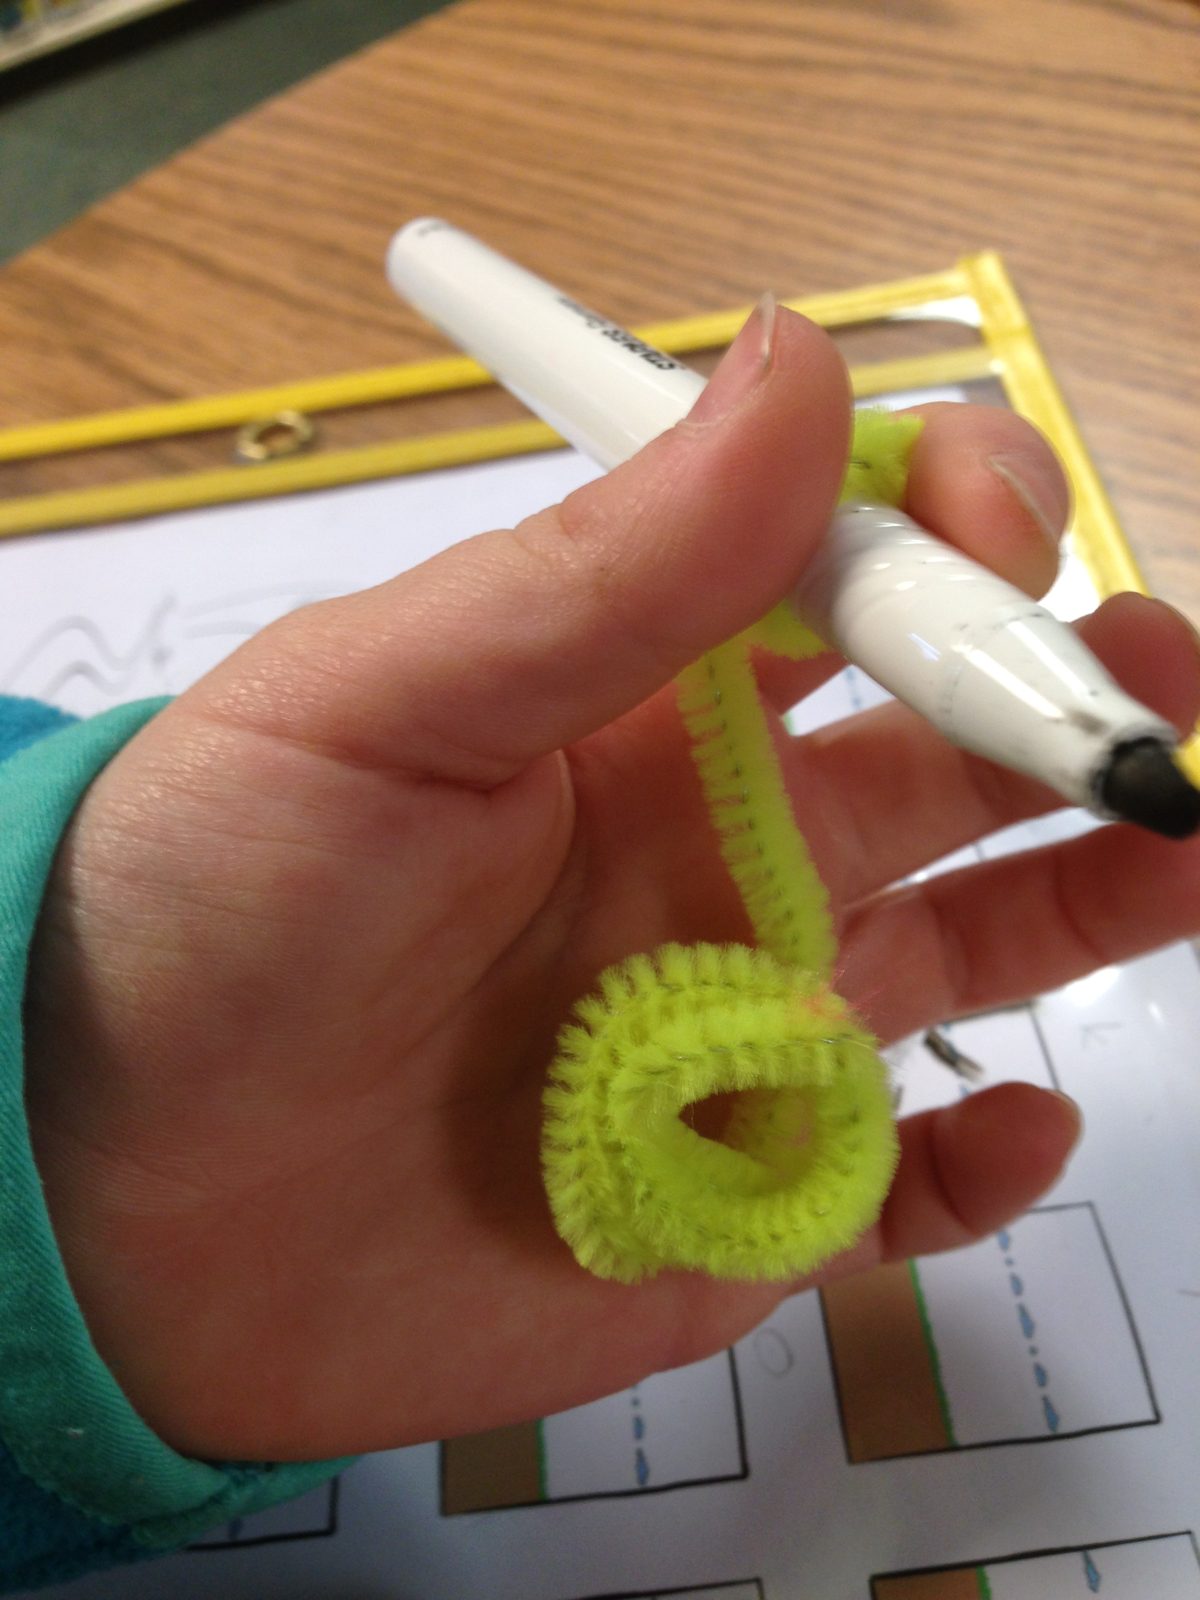
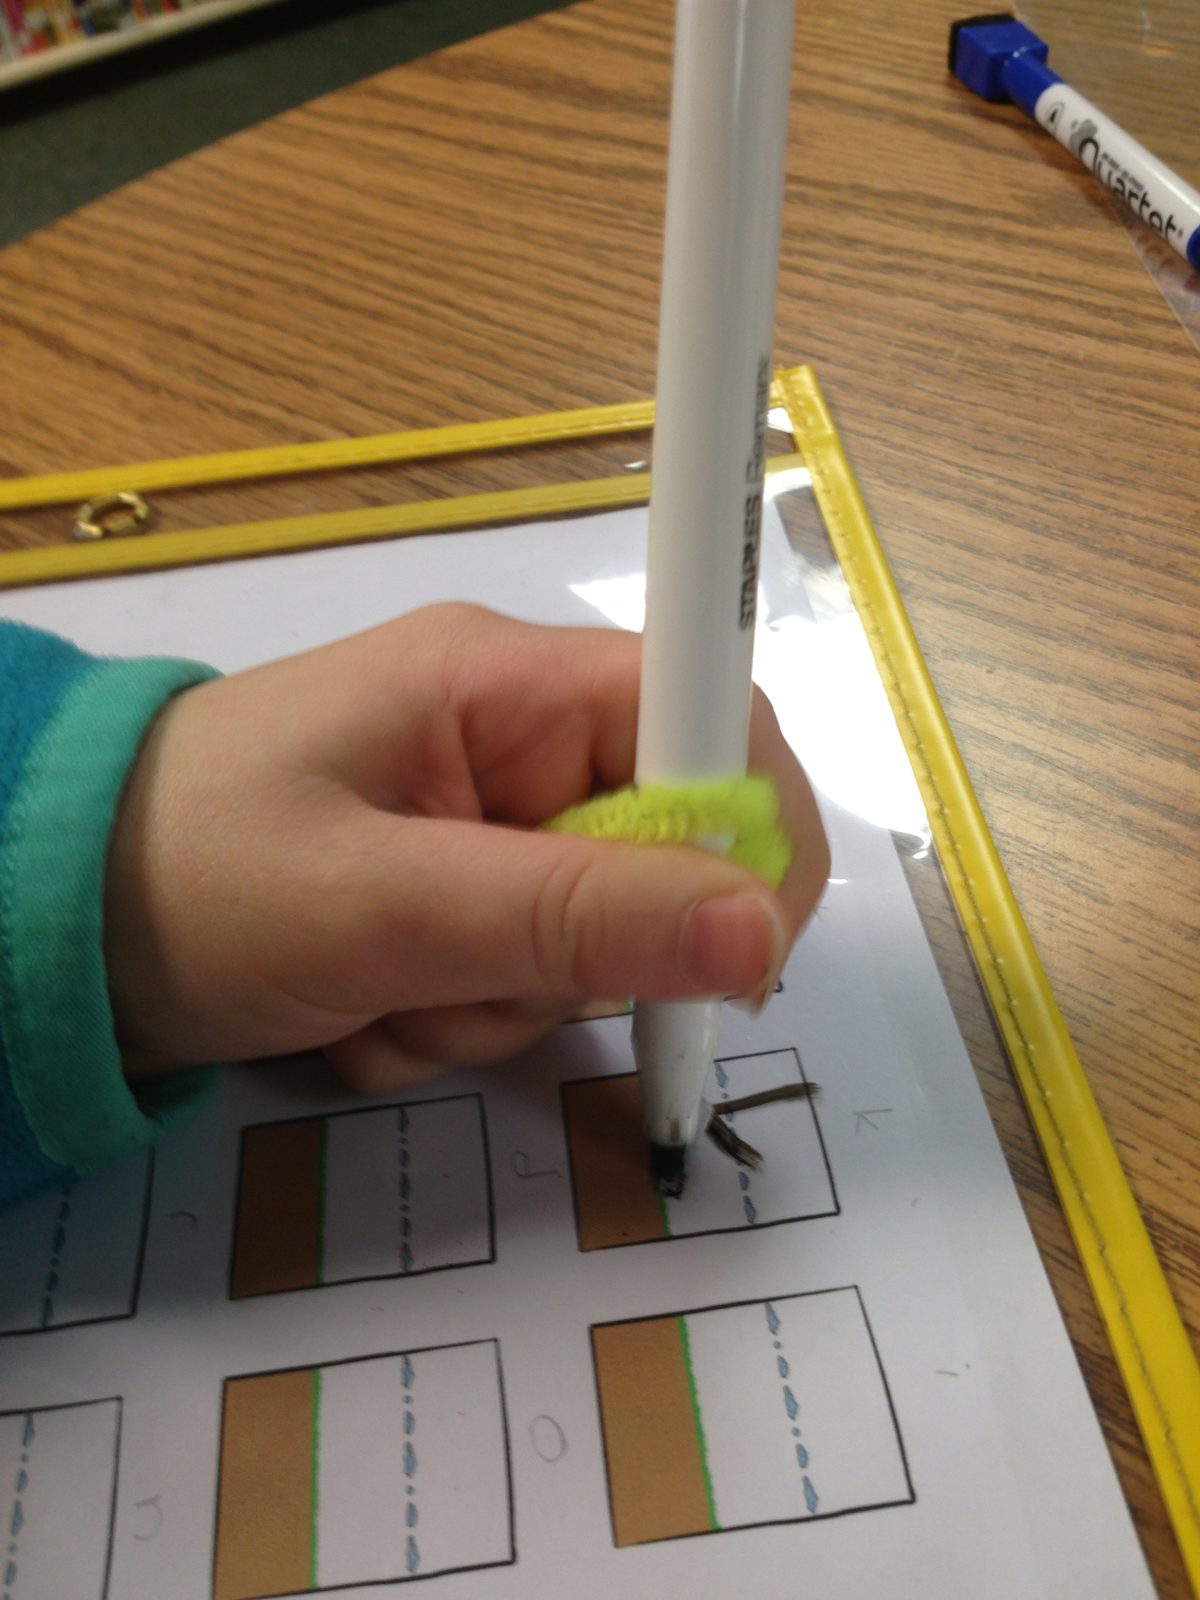
The second problem: the marker was not resting in the web space between his thumb and index finger. To address this, I attached a second Wikki Stix near the top of the marker and looped it around his wrist. The gentle tension draws the shaft back so it settles into the web space on its own.
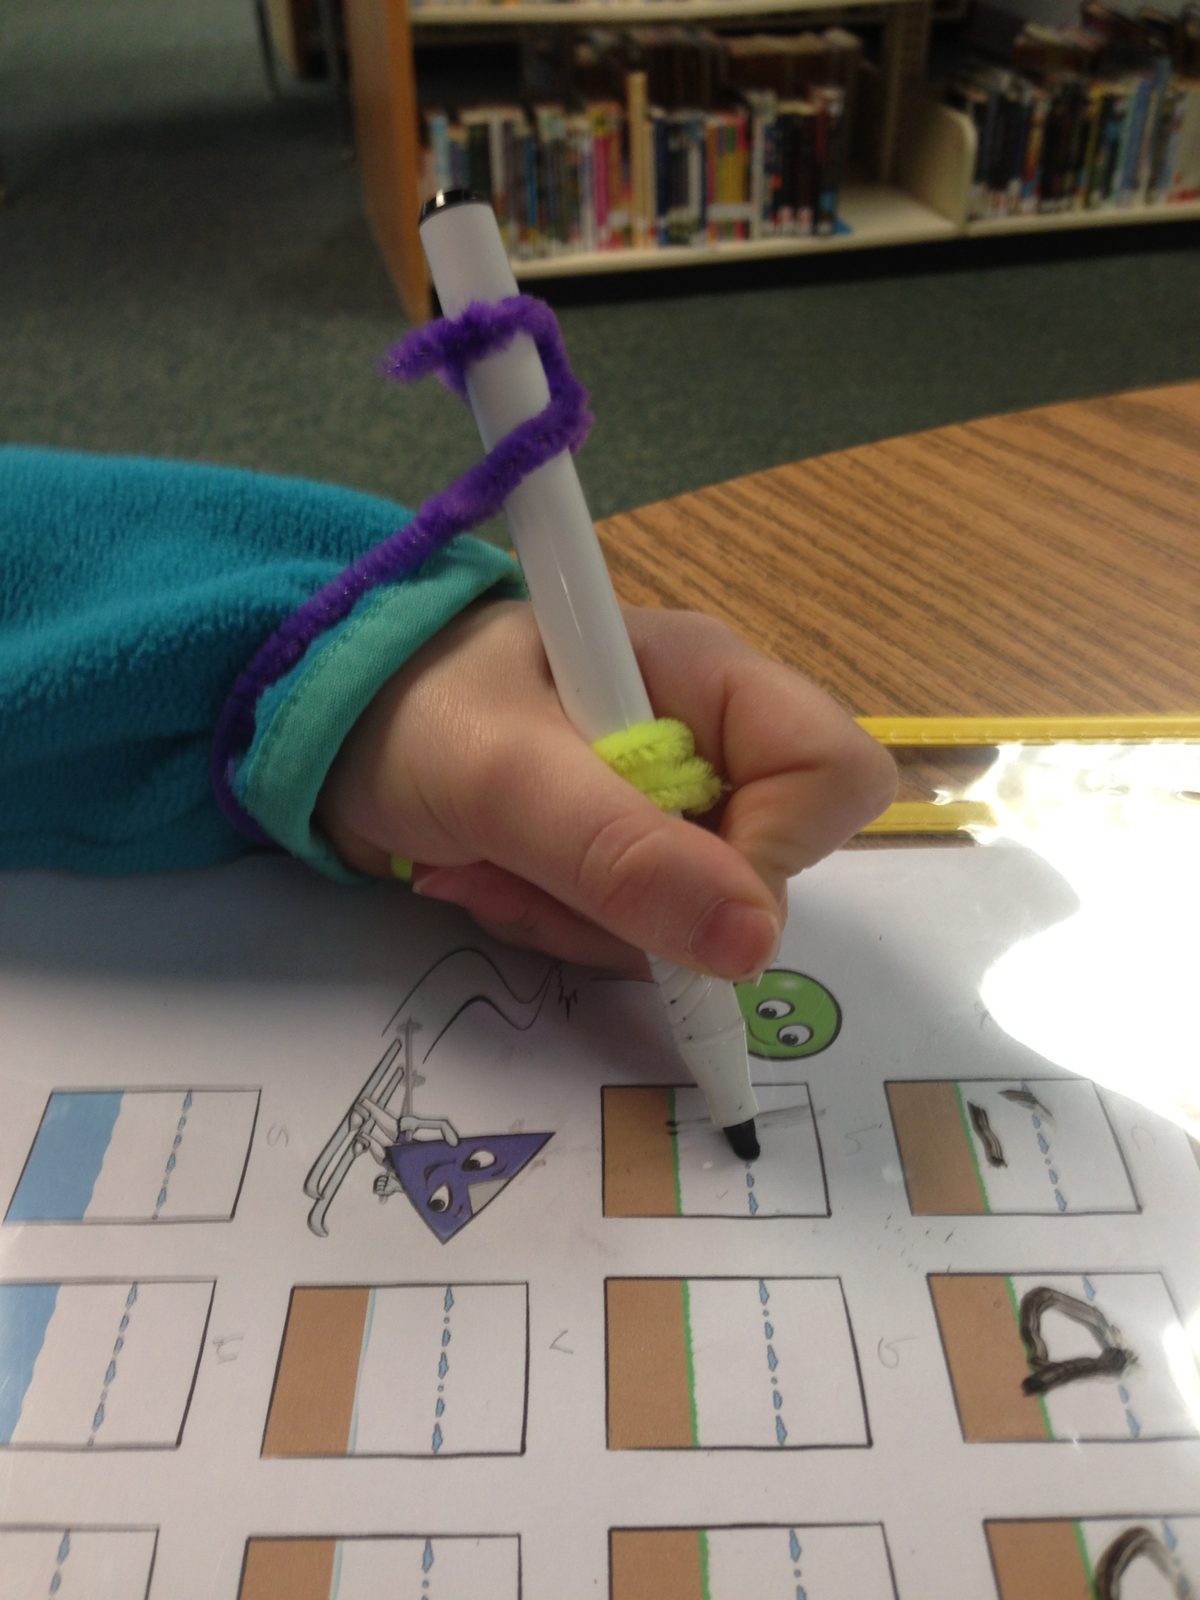
The same method applies to any grasp: identify the specific problem, then construct a cue that addresses it directly. None of it is meant to be permanent; that is the point. These temporary cues give the hand a feel for correct positioning, and as the grasp becomes habit, the Wikki Stix come off.
Seeking Additional Support
Some children need more support than practice alone provides. If a child continues to struggle with grip despite the techniques above, underlying issues like hand strength, coordination, or visual motor skills may be present. In such cases, consulting an occupational therapist can help identify and address these challenges to ensure proper pencil grip development.
About the Author: Cheryl Bregman, OT, M.S.
Cheryl Bregman is an occupational therapist with 25+ years helping children overcome handwriting challenges and the founder of Handwriting Heroes. She holds a Master’s in Technology in Special Education from Johns Hopkins University.